
I hope you have time in your schedule to create this winter. Check out my upcoming events or schedule time with me to see some new products. I look forward to seeing you soon.
Happiness is a Cup of Coffee!
I love this new stamp set from Stampin’ Up! The Coffee Café Stamp Set and Coffee Cups Framelits Dies make a simply delicious combination! Plus, you’ll save 10% when you buy them in a bundle!
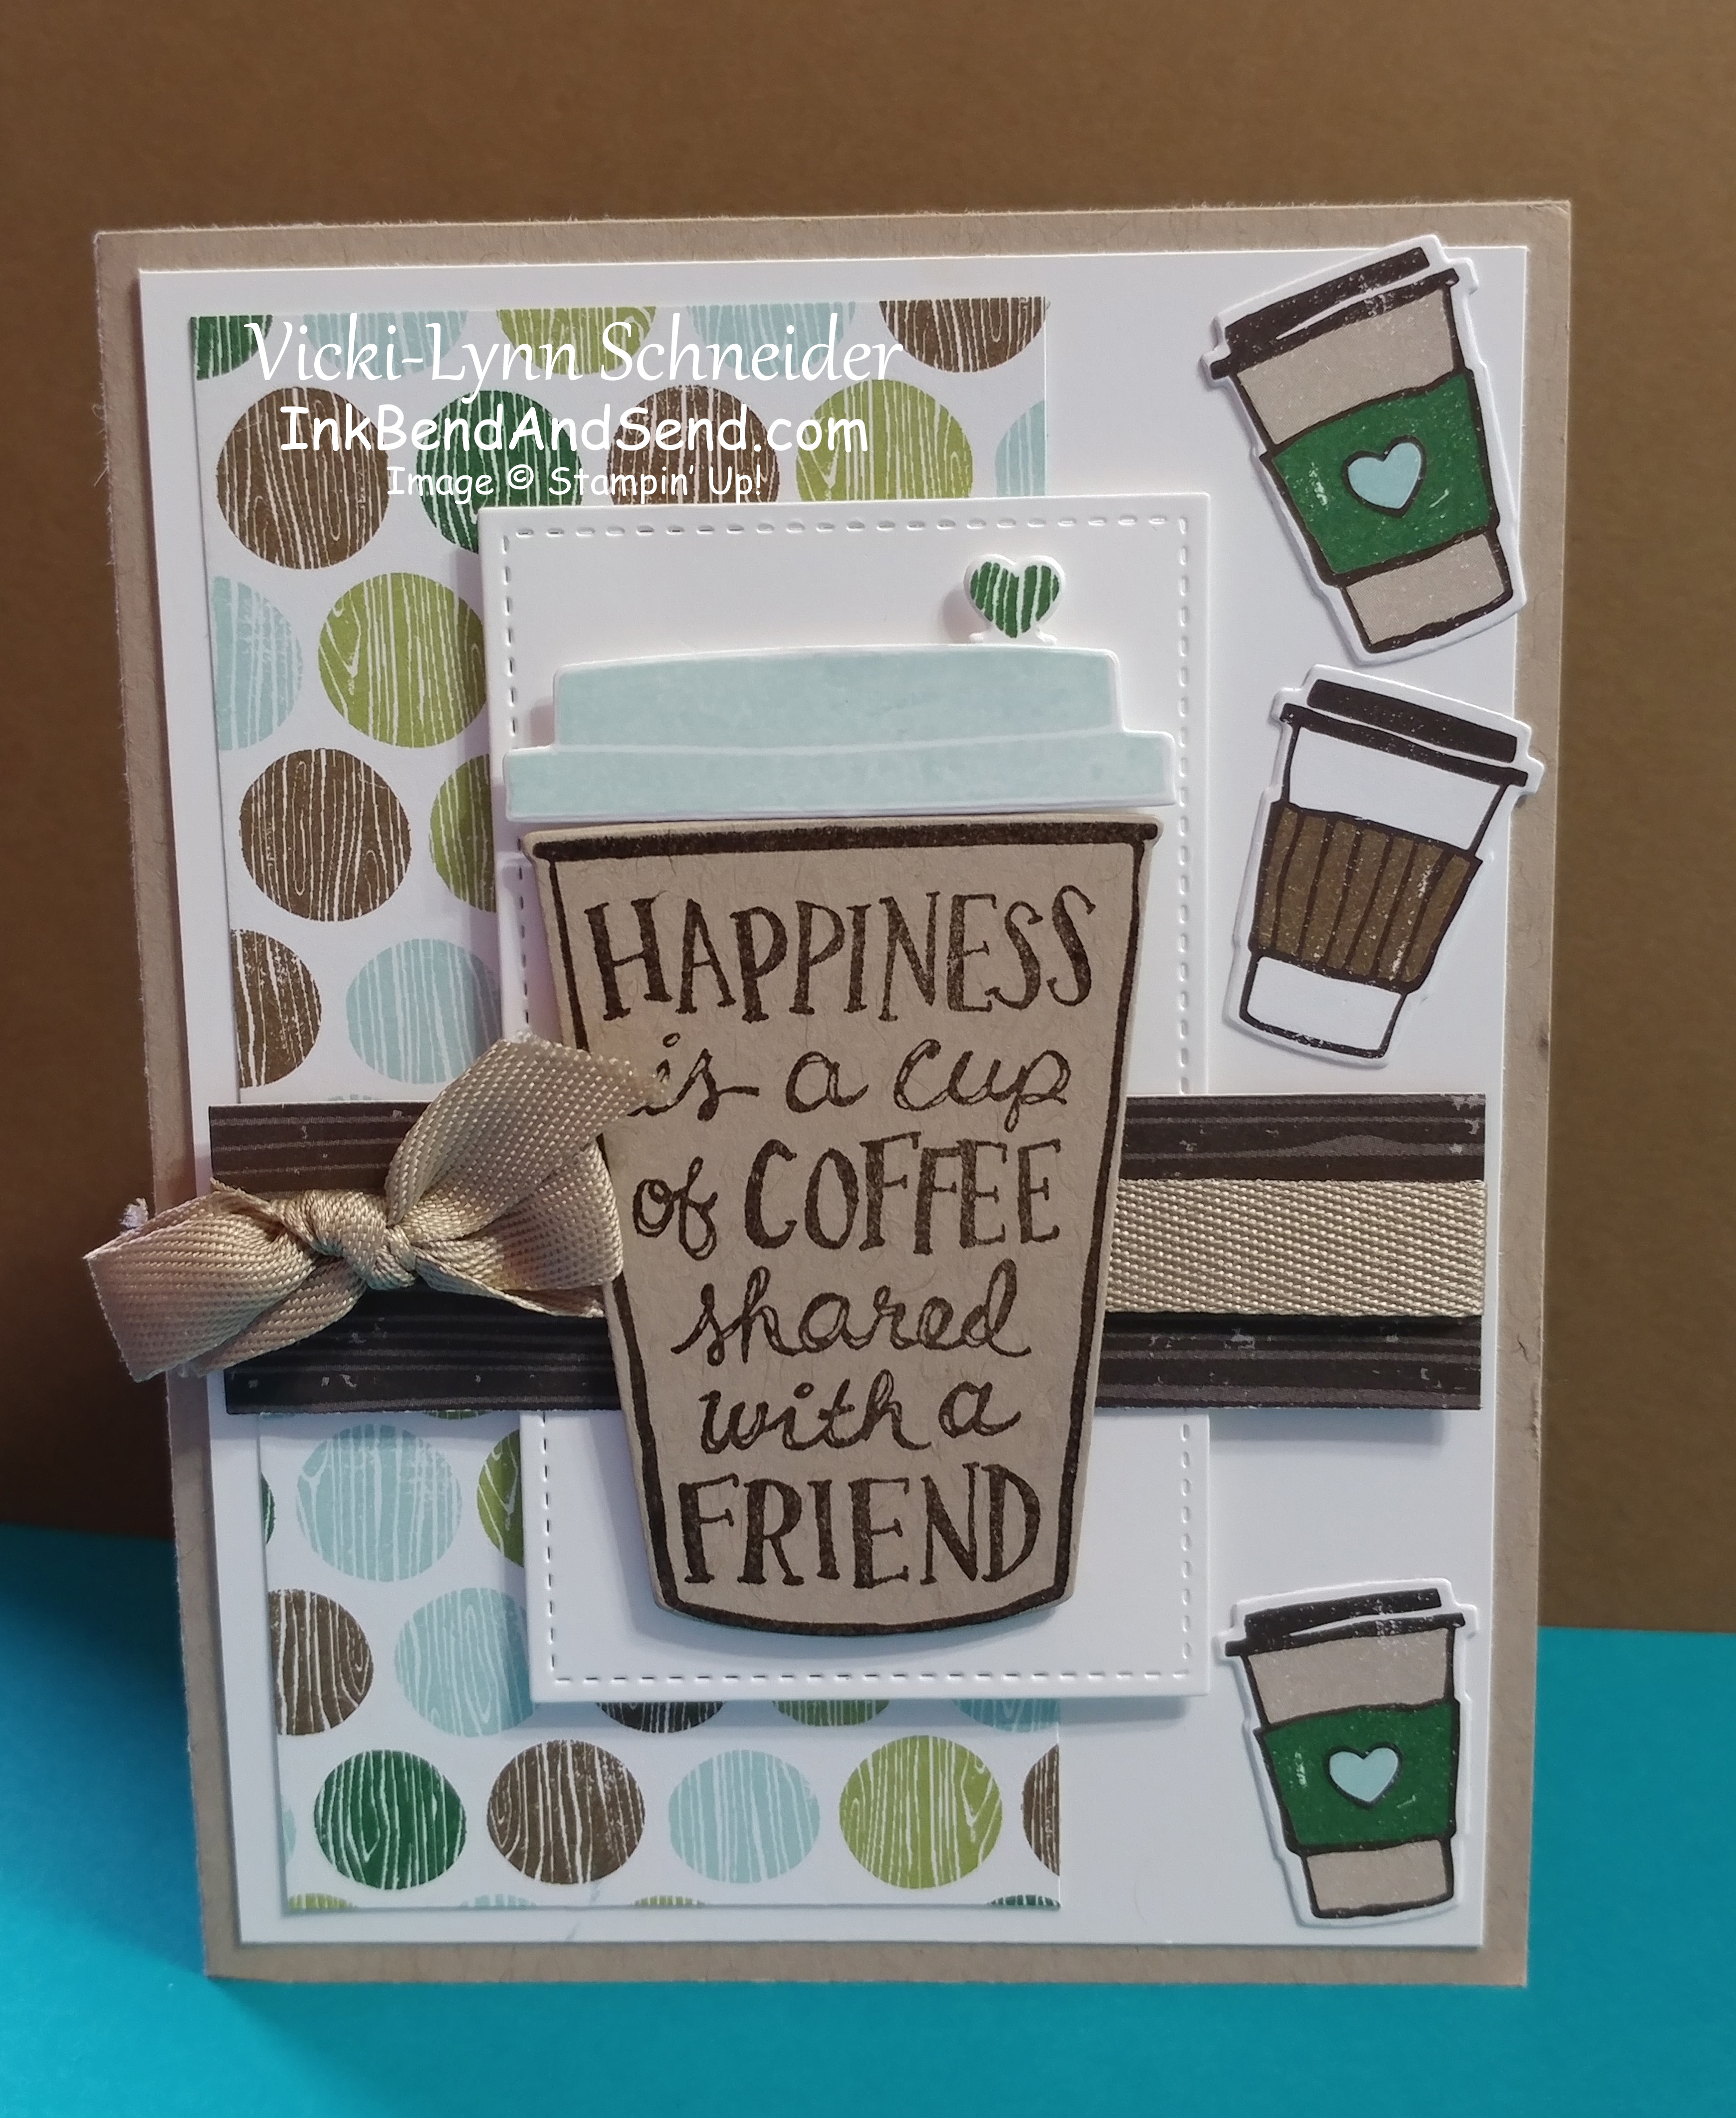
- To start, I used Crumb Cake for the base of the card (8 1/2 x 5 1/2 inches folded in half) followed by Whisper White for the next layer (5 1/4 x 4 inches). I glued these together and put them to the side for the moment.
- My next step was to take another piece of Whisper White Cardstock and run it through the Big Shot with the square from the Stitched Shapes Framelits to cut it out.
- Repeat this, as you will need two of them.
- I will be placing these behind the coffee cup. Since we don’t have rectangle Framelits I decided to use two squares and disguise them behind ribbon and paper. Tricky!!!
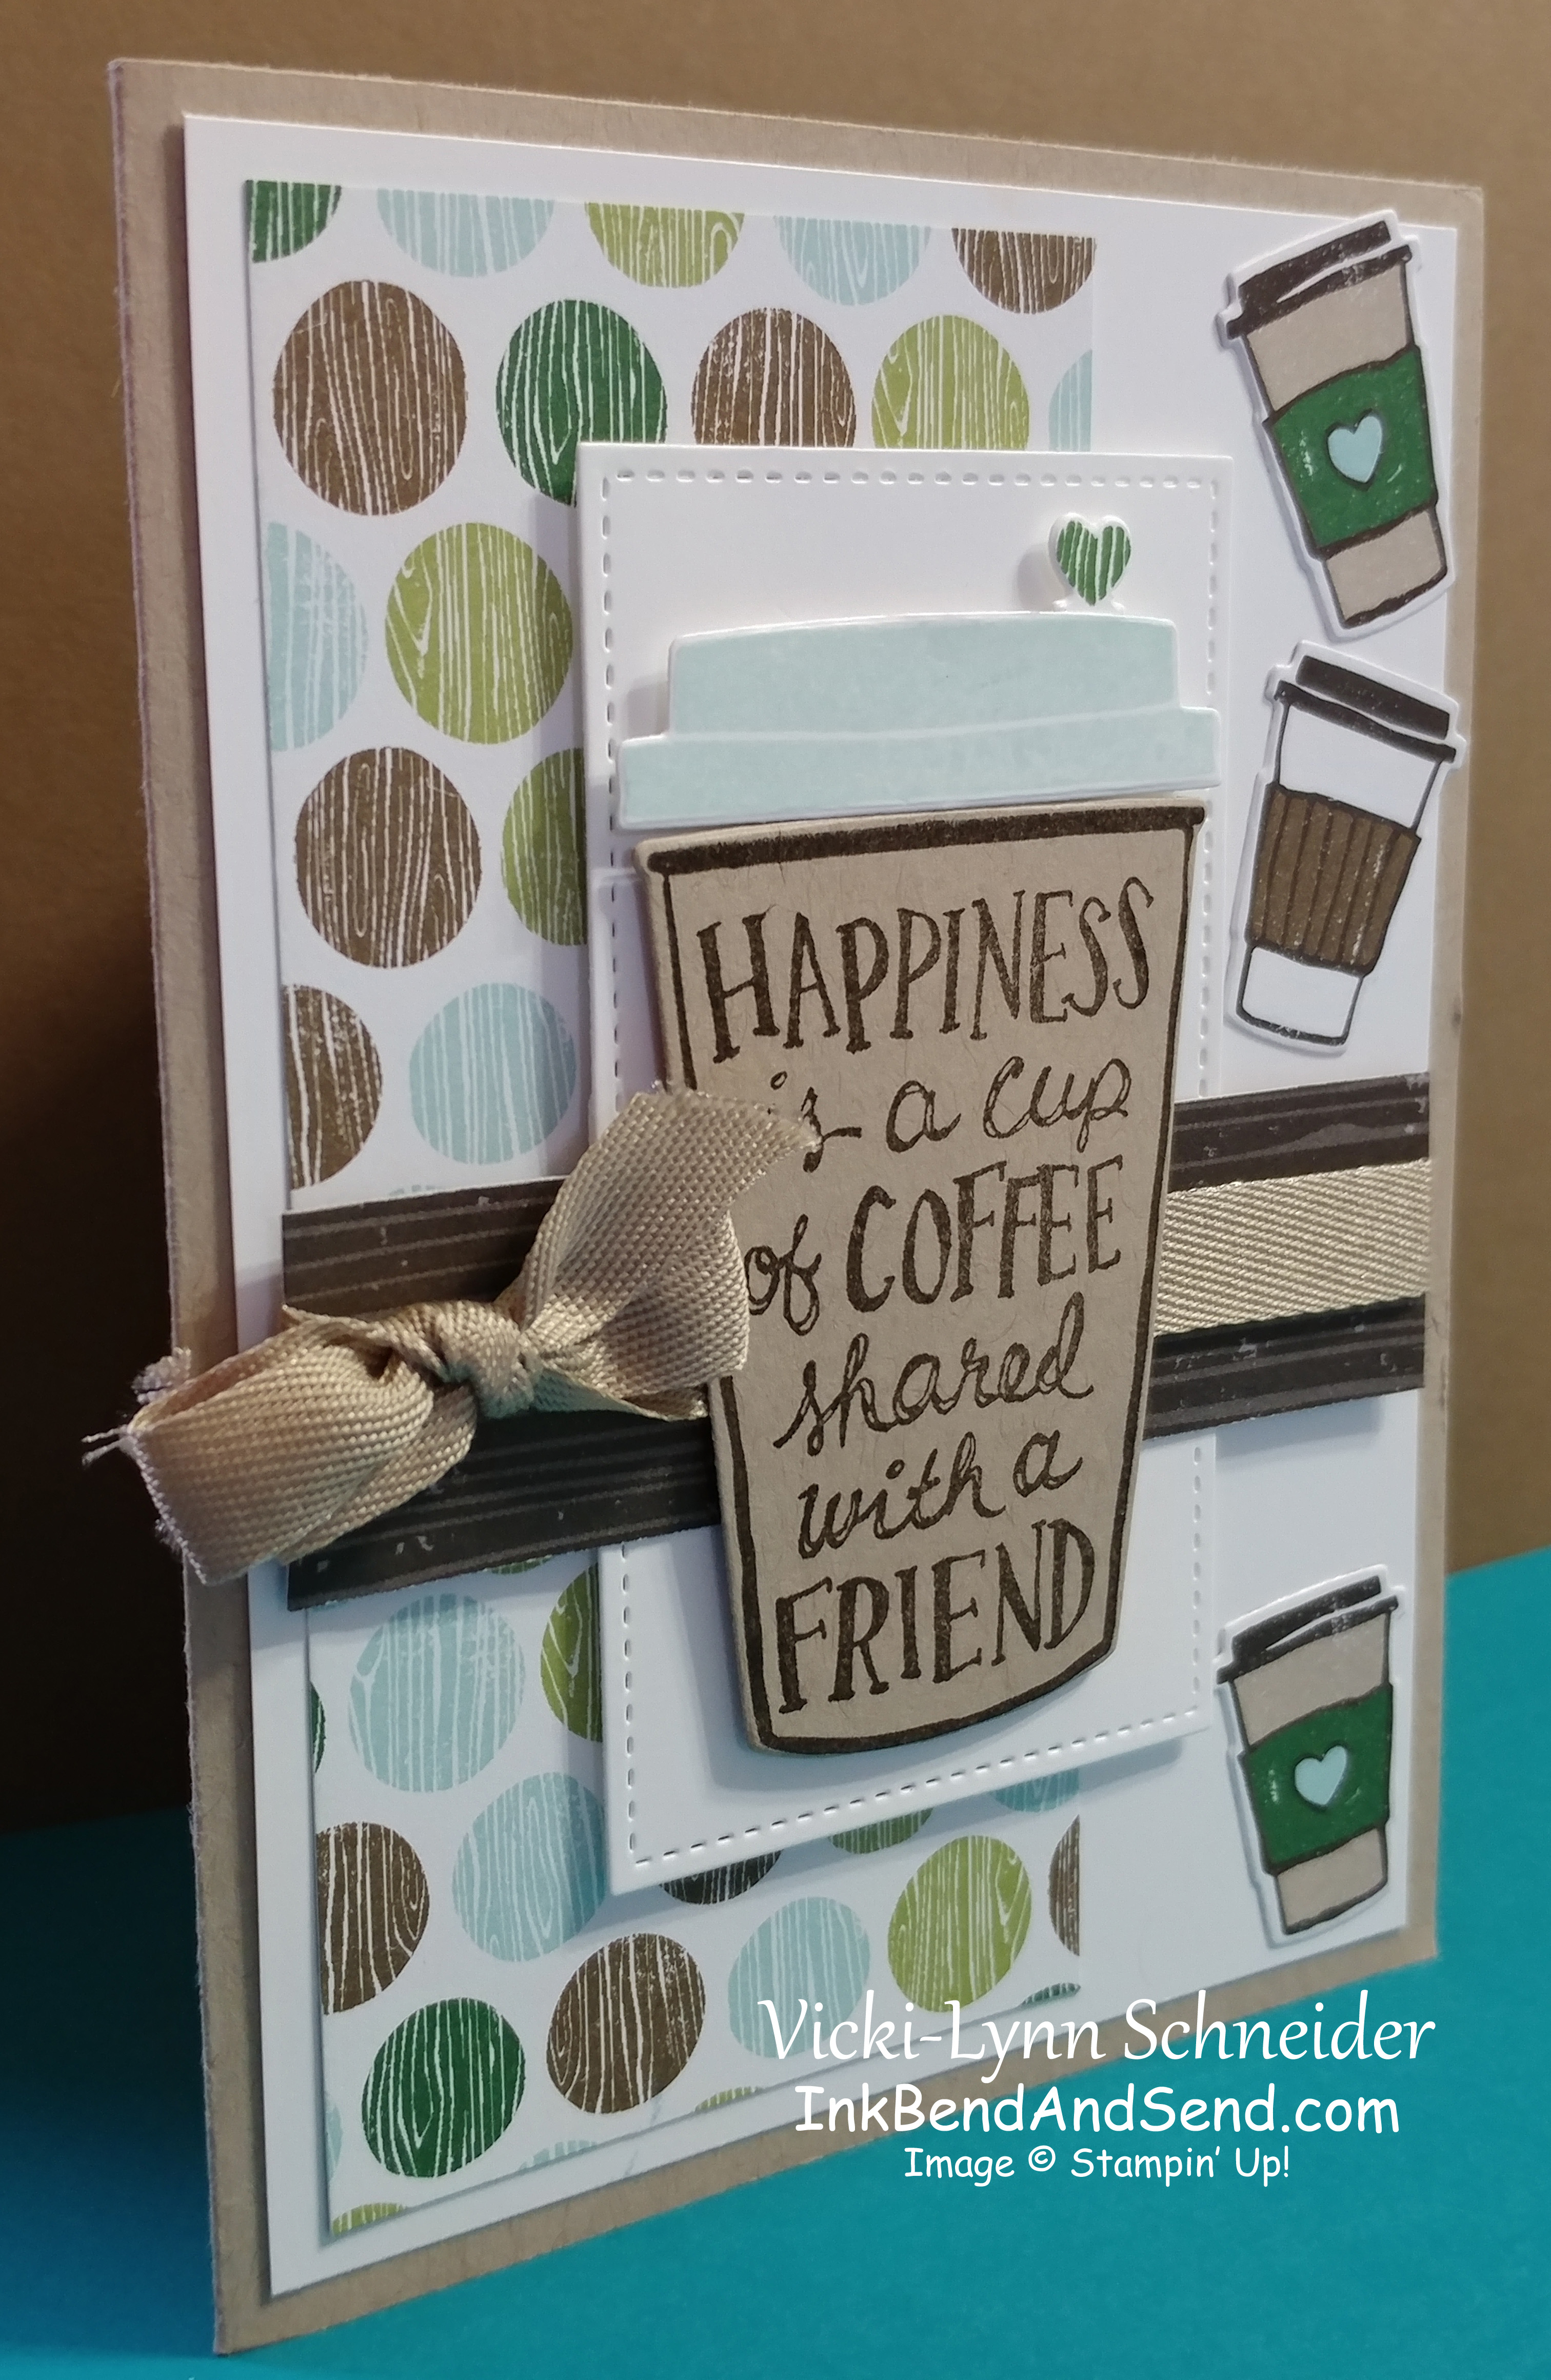
- The coffee cup outline and words were stamped in Early Espresso Classic Ink on Crumb Cake Cardstock. The coffee cup lid was stamped in Soft Sky on Whisper White.
- I stamped a heart on Whisper White Cardstock with Garden Green Classic Ink. Then I used the Big Shot to cut all of these pieces out with their coordinating Framelits.
I used 3 different designs from the Coffee Break Designer Series Paper (DSP)
- Cut out a piece of the dot paper that is 5 x 21/2
- Cut out a piece of the brown striped paper 37/8 x 1 inch.
- Take the DSP from the set that has the small coffee cups on it and cut out 3 cups.
- Use the Crumb Cake 3/8’ Classic Weave Ribbon and wrap it around the brown striped piece of DSP that you just cut and tie a bow.
- Attached it right over the two stitched squares making sure that you create a big enough rectangle for your coffee cup to fit on.
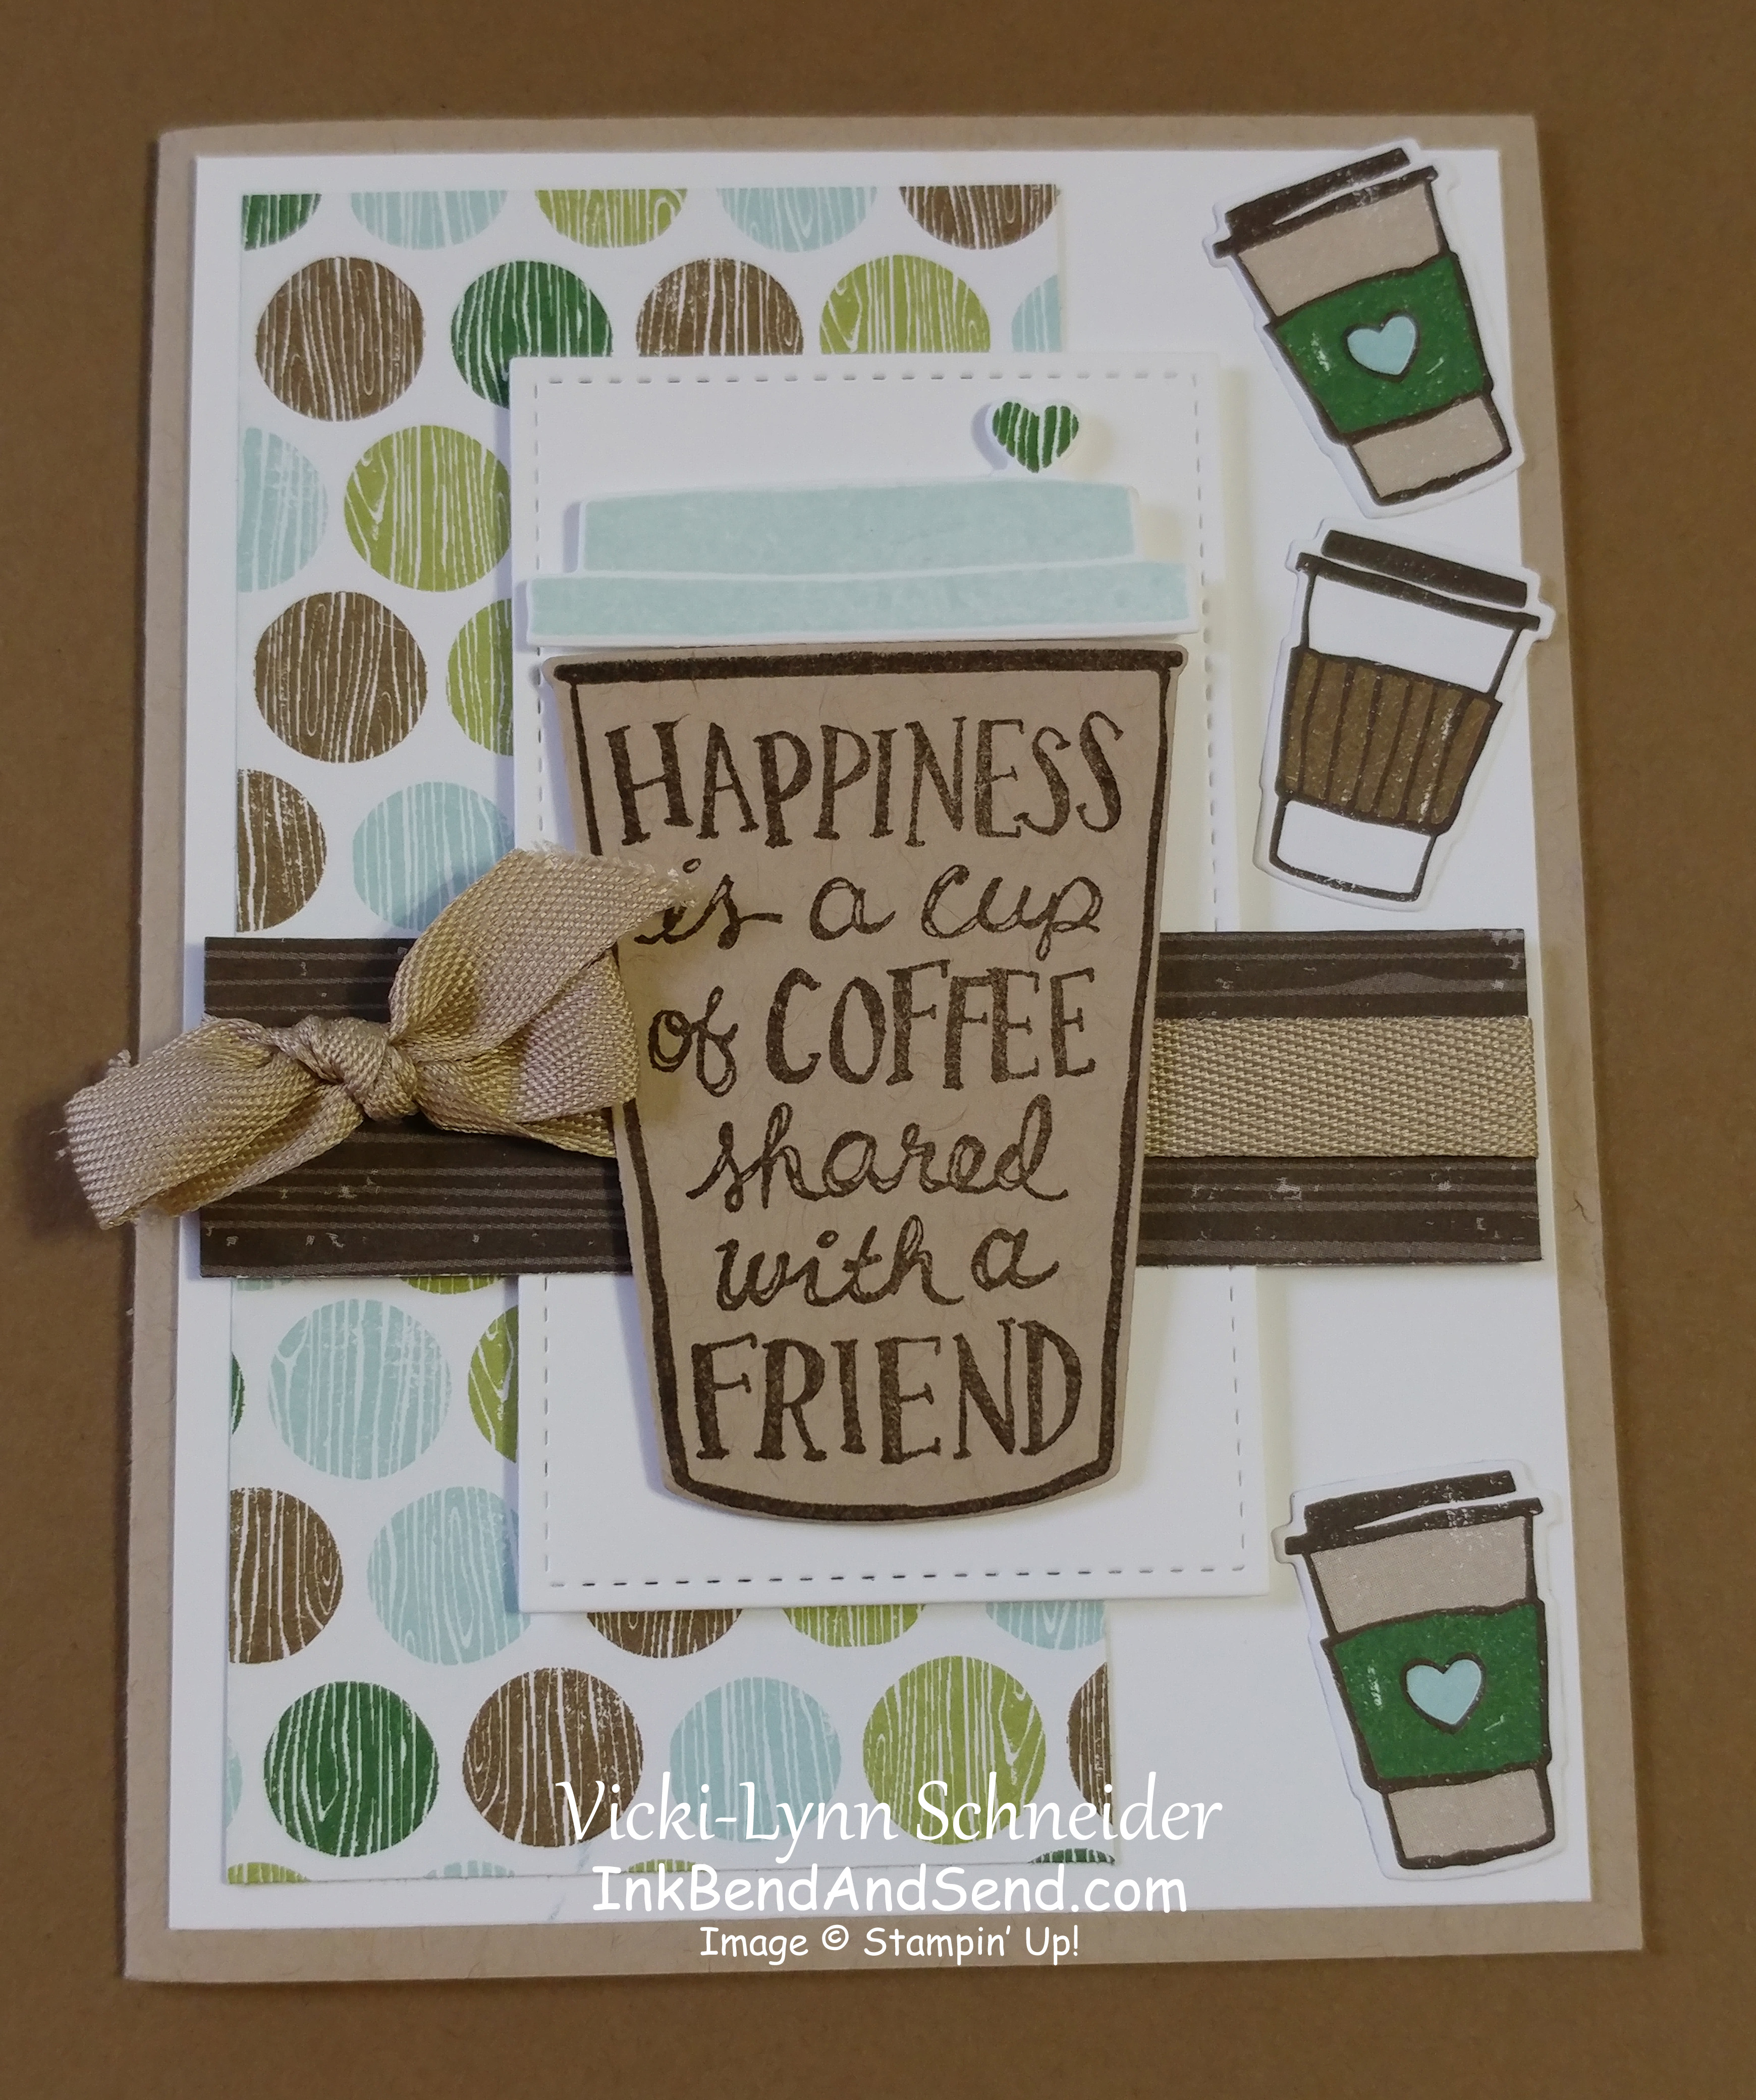
- Grab all your pieces and adhere the cup to the stitched squares & ribbon using the Dimensionals. Don’t forget to put the splash stick in your cup (the Framelit that looks like a heart on the top of a stem).
- I added Dimensionals to the back of the stitched square as well (I can’t help it – I love all the pop!)
- Attach the dot DSP to the base of your card and then attach the cup ensemble.
- As a final touch, attach the 3 small cups we cut out.
- You are all done!
I hope you had a great time creating with me today. Thank you so much for stopping by.
What you need to create this card…
The easy way to shop! Click on images below for more details or add to your order.


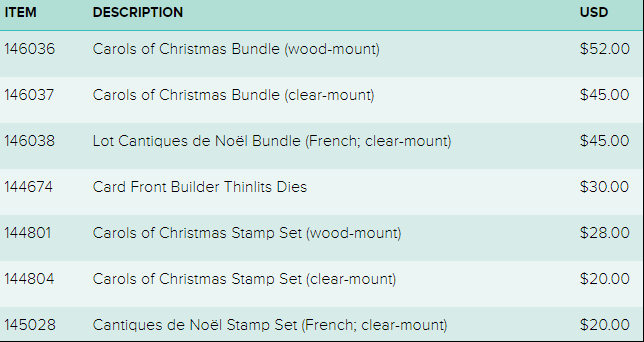
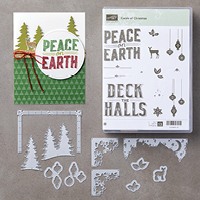
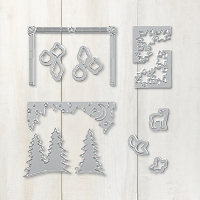
Carols of Christmas — Early Release!
This month you can purchase the Carols of Christmas Stamp Set and Thinlits. If you purchase both you can save 10% with the bundle pricing.
Now for some samples…
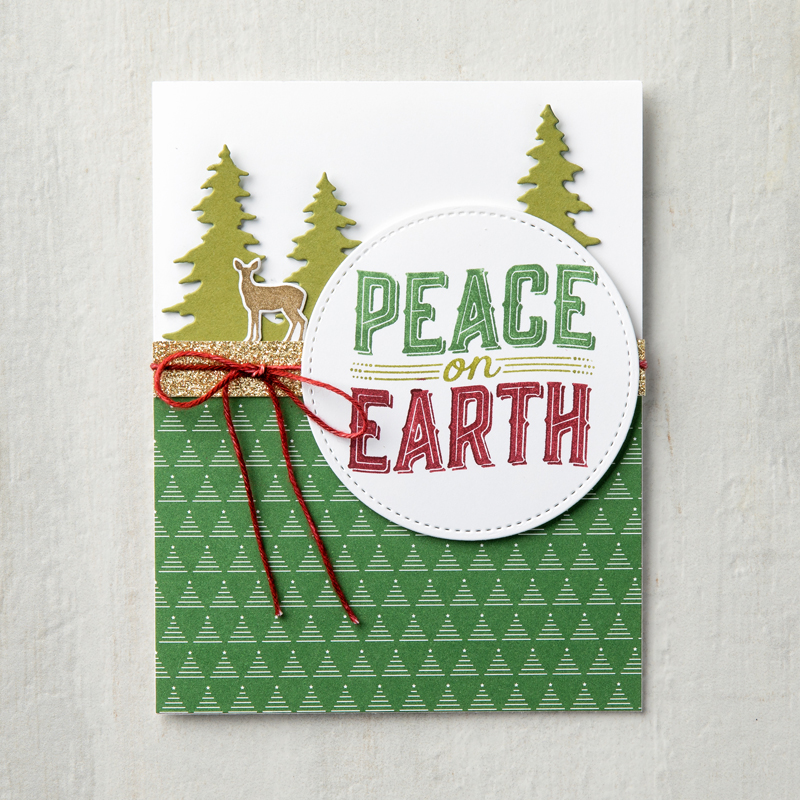
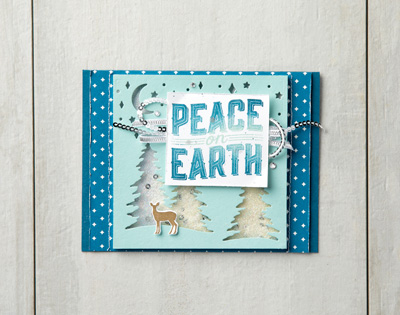
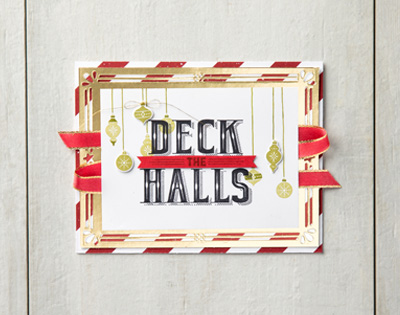
There are two word stamps in this set: ‘Deck the Halls’ and ‘Peace on Earth’. Just the right size to give your cards some POP. I have made 3 samples and also below there are some samples the Stampin’ Up! office has made for us to show off.
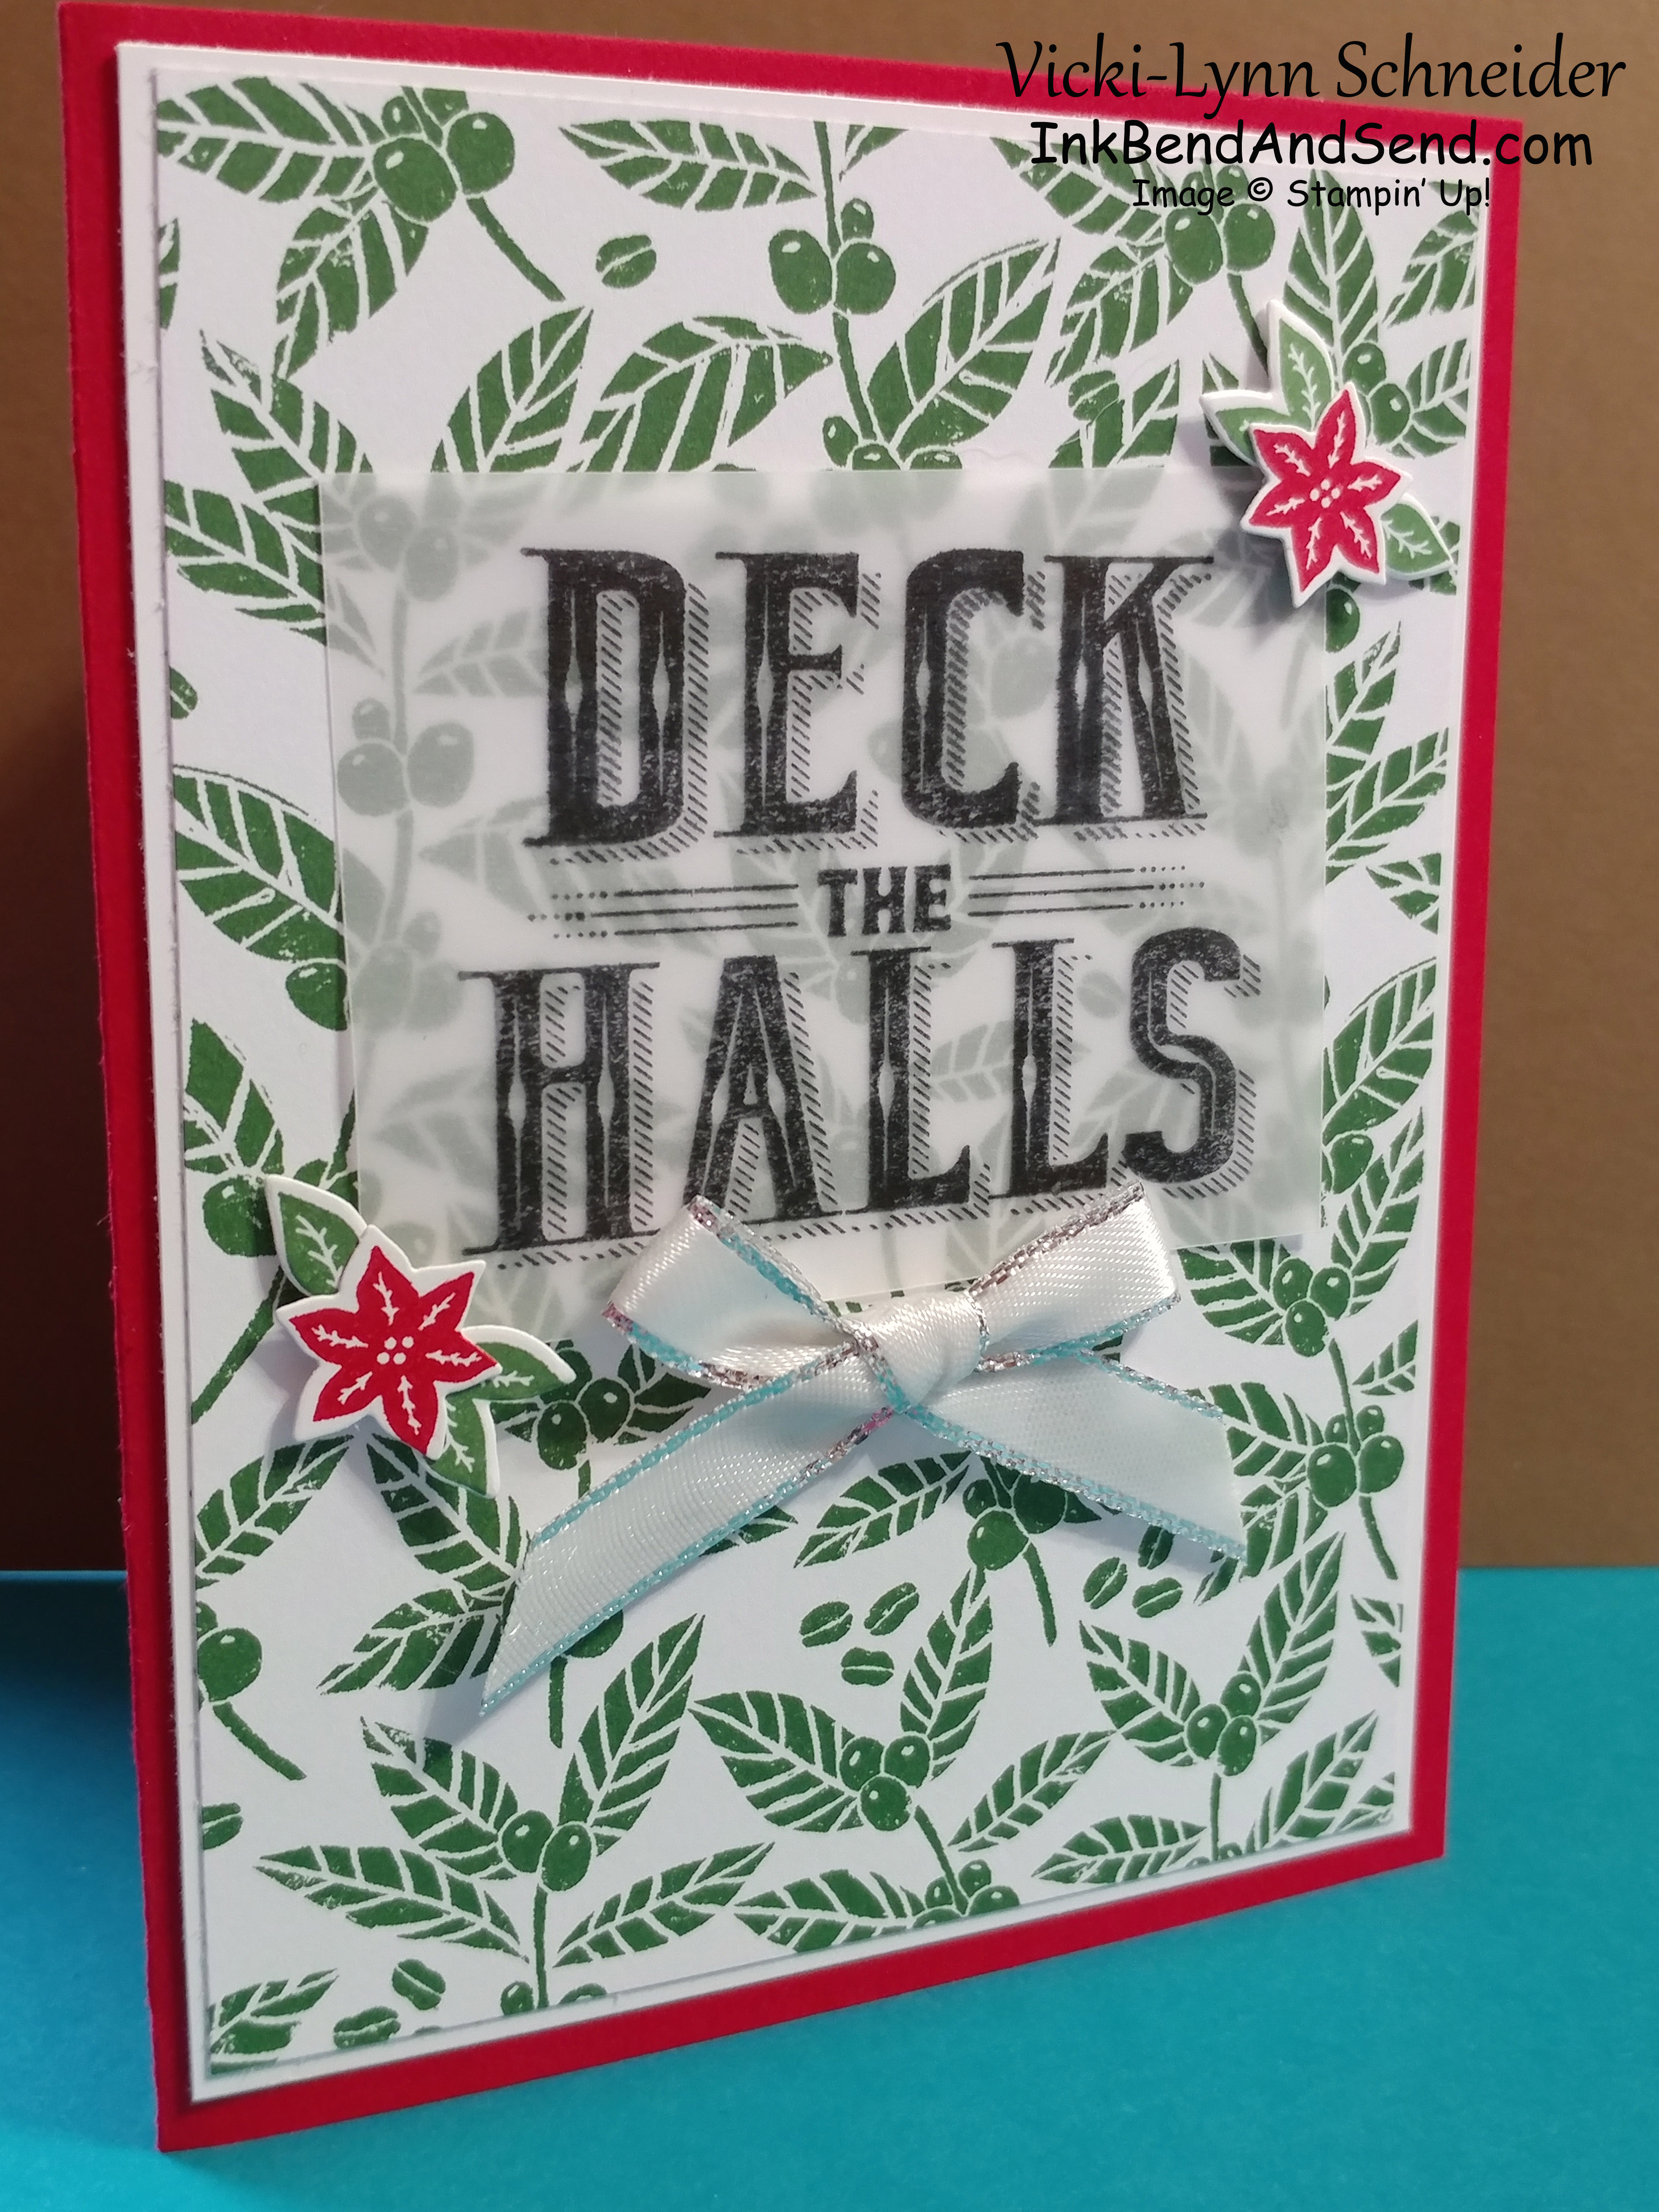
- This first card was made with Real Red & Whisper White Cardstock. The poinsettia was stamped in Real Red Classic Ink and the leaves were in Garden Green Classic Ink on Whisper White Cardstock. I cut them out using the Thinlits. Deck the Halls was stamped in Basic Black Archival Ink on Vellum Cardstock. The background paper I used is from the Coffee Break Designer Series Paper. It is a great touch to this card. Who says you have to only use holiday paper on a holiday card?! To finish up, I dressed up the card with a piece of Glossy White Satin Ribbon with a Metallic Silver Edge.
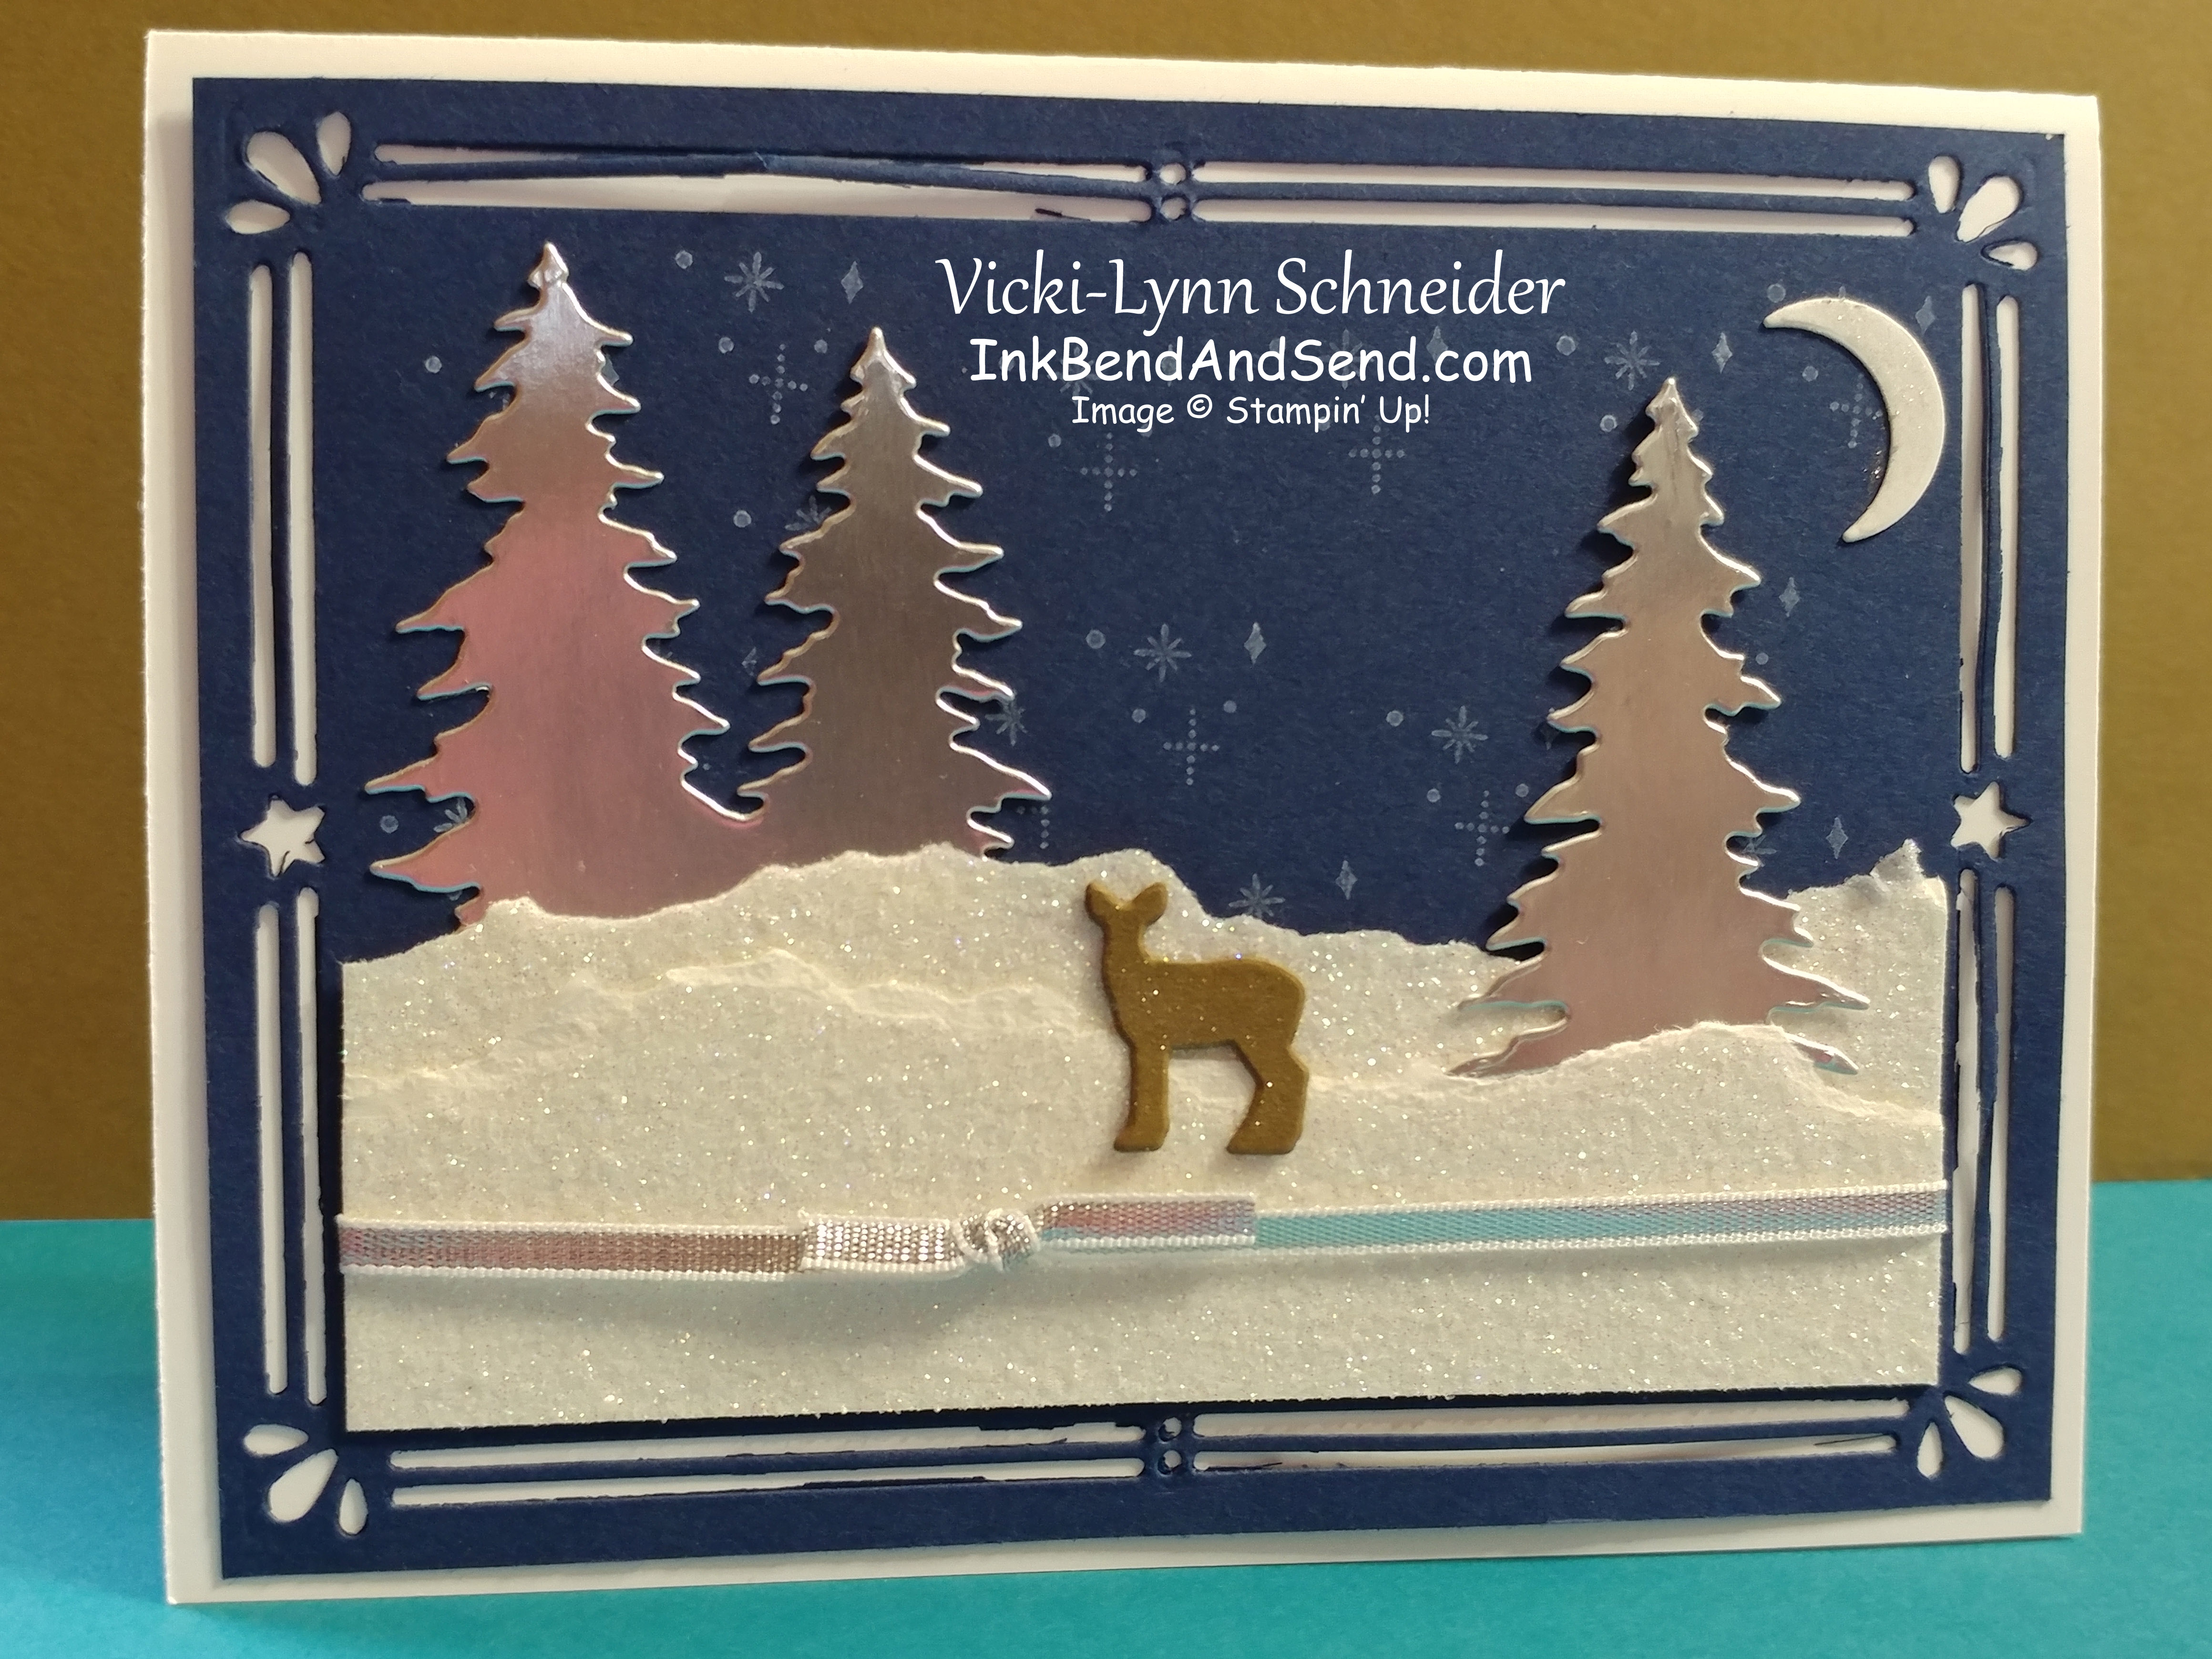
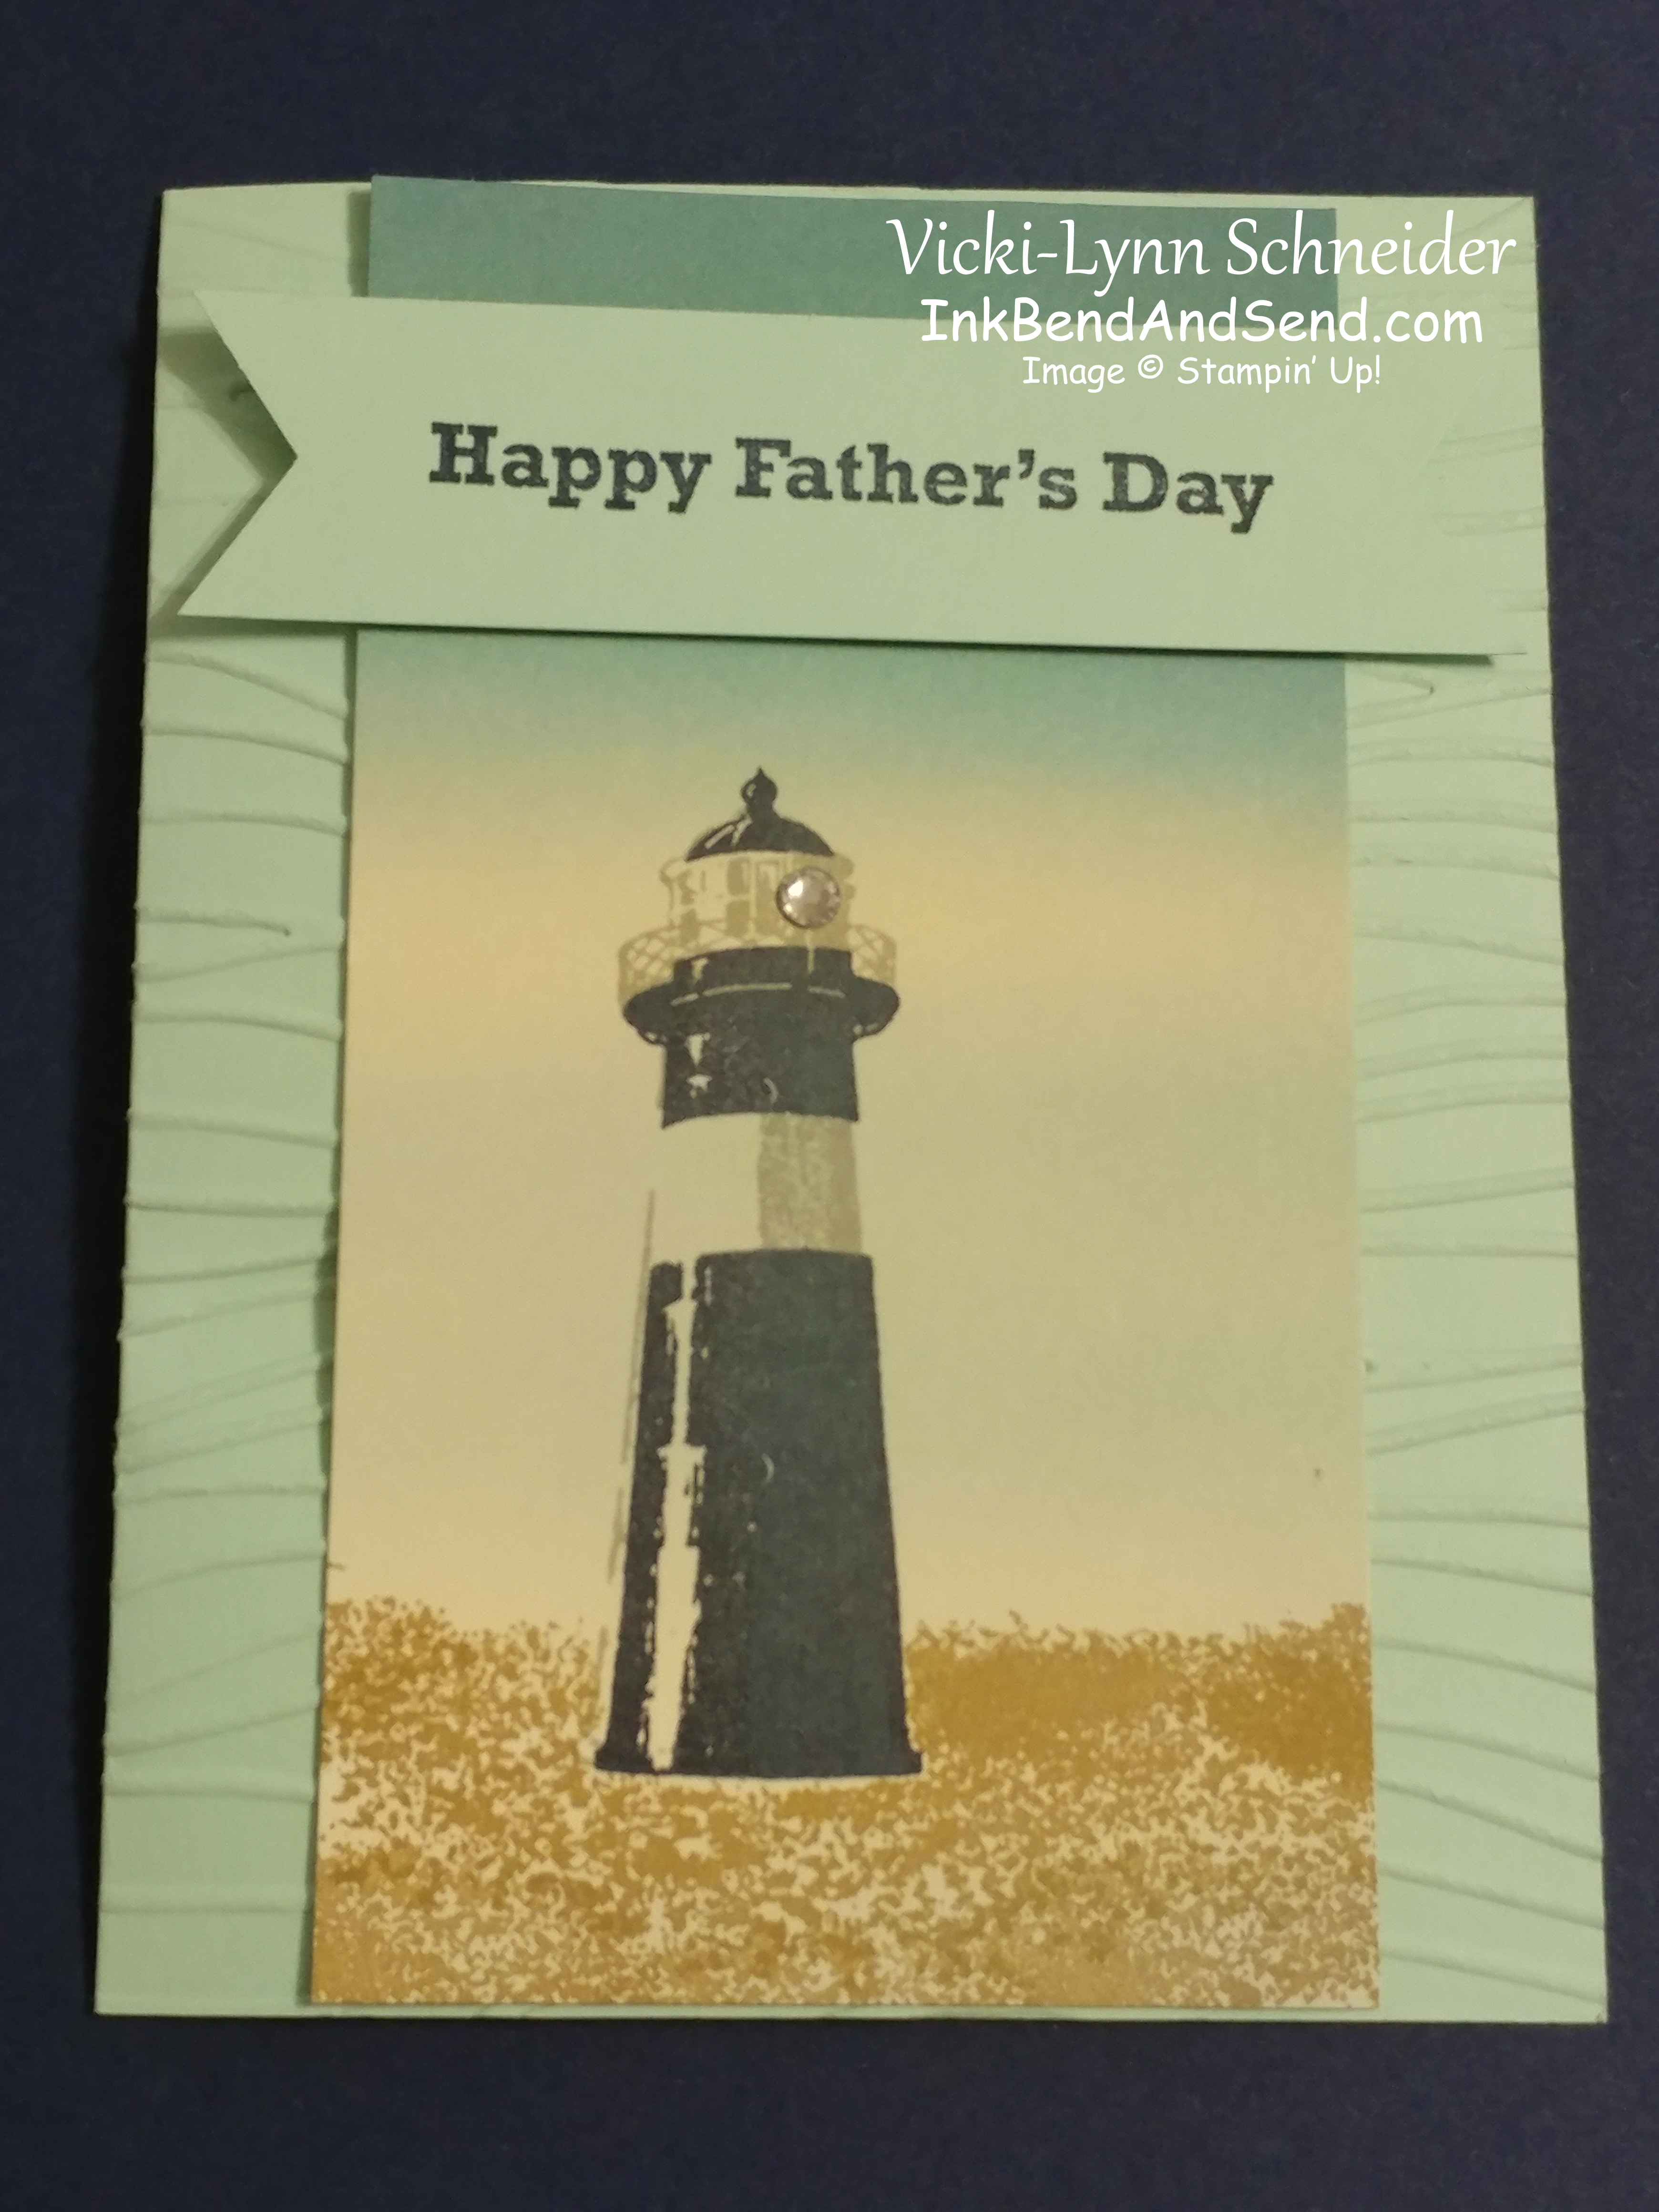
- For my second card, I wanted an outdoor scene to show off the snow and trees. I used the Whisper White Cardstock for my card base. Then took a piece of the Night of Navy Cardstock and used the Thinlits to make the decorative edge. You need to do this step twice. Make sure you line up the holes so your edging is straight! Once that was done I stamped the stars on the Night of Navy in Whisper White Craft Ink. I took a piece of the Silver Foil Sheet and cut out the trees. I cut out the deer from Soft Suede Cardstock and the moon from the Whisper White Cardstock. Now I took a piece of the Dazzling Diamonds Glimmer Paper (2” x 4.5”) to make the snow. I tore it in half on the 2” side then layered it to make snow. I love this paper because it makes it so much easier to add glimmer to your projects with very little mess. I wrapped a piece of Silver 1/8” Ribbon around the snow and mounted it to the card. To finish up I added all my pieces to my snow scene. After it was all put together I decided to grab my Clear Wink of Stella Glitter Brush (another favorite item) and brushed it on the moon and deer. Viola!
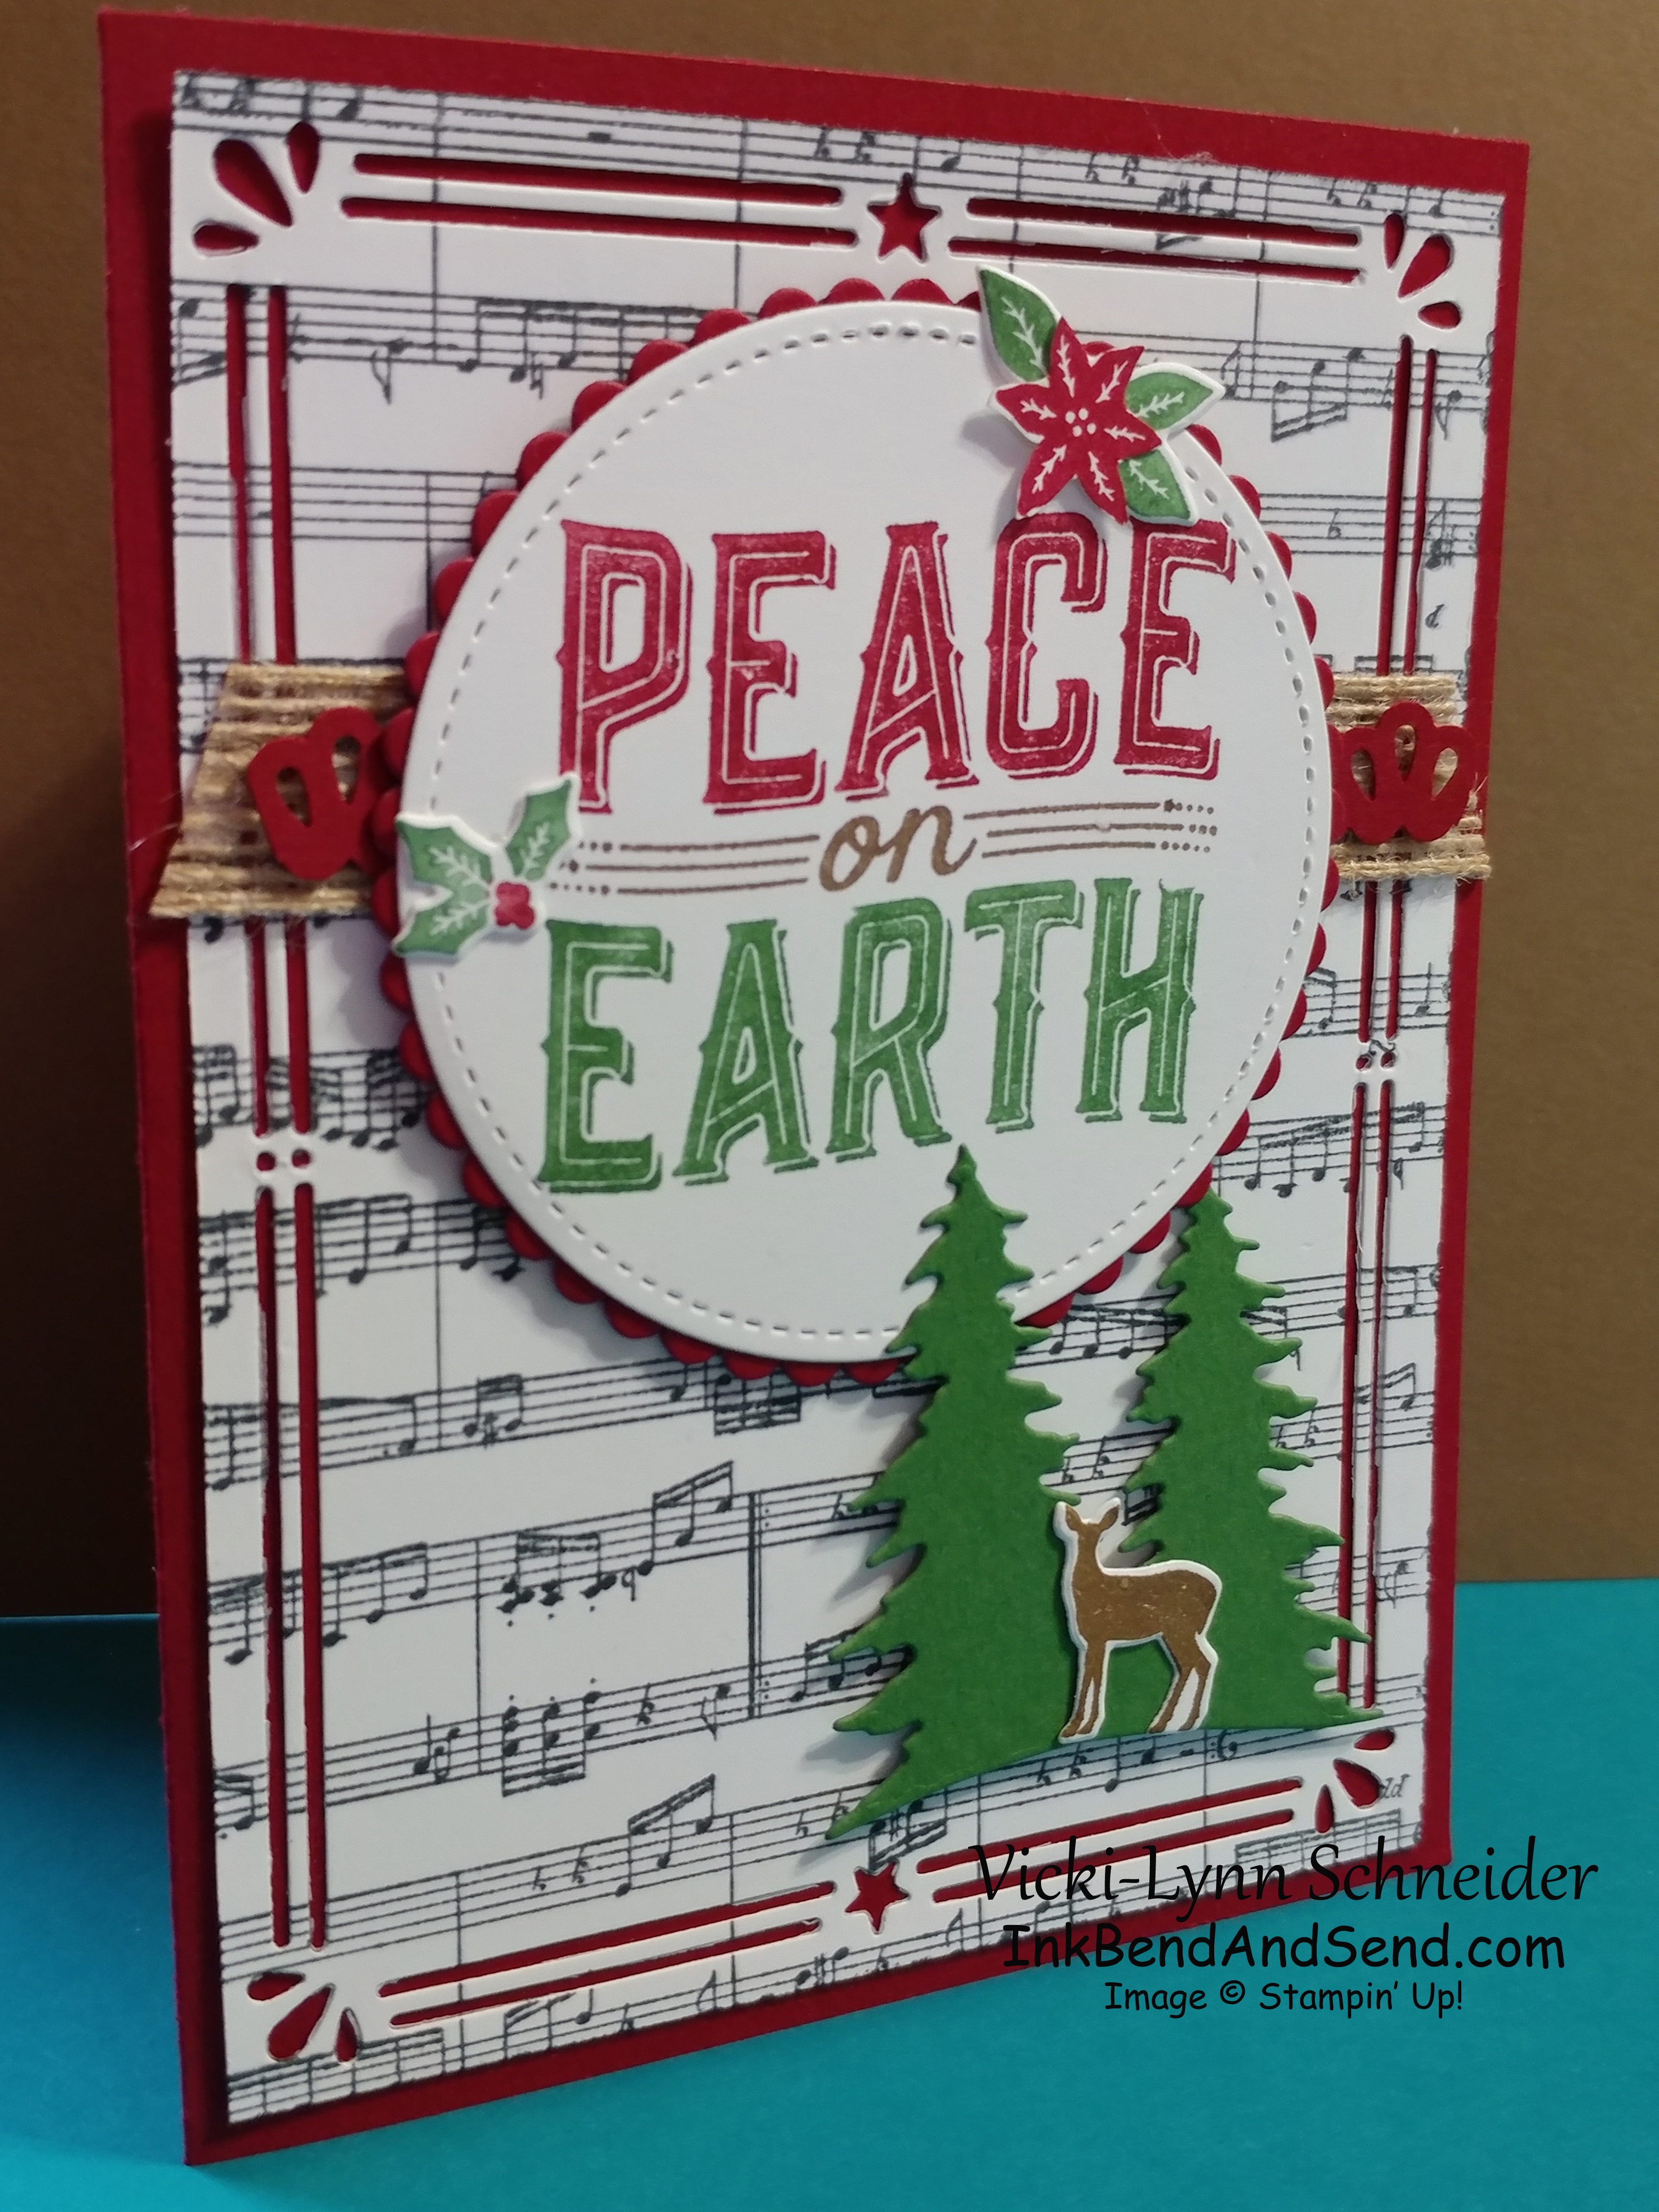
- For card number 3, I had a bunch of fun. I used Cherry Cobbler Cardstock for the card base. I stamped the Sheet Music Stamp on the Whisper White Cardstock with the Basic Black Archival Ink then I took the Thinlits and cut out the pretty edging. I used my Cherry Cobbler, Soft Suede and Garden Green Markers to draw on the stamp to get the Peace on Earth to be 3 different colors on Whisper White Cardstock. This technique is great to add multiple colors to a stamp easily. I used one of the circles from the Stitched Shapes Framelits to cut it out. The scallop circle was cut by the Layering Circle Framelits. It added a great touch. The deer in Soft Suede Classic Ink, the poinsettia was stamped in Real Red Classic Ink and the leaves were stamped in Garden Green Classic Ink on Whisper White Cardstock and used the Thinlits to cut all of them out. The trees were cut out of Garden Green Cardstock with the Thinlits as well. When I was putting the card together I added a strip of Cherry Cobbler Cardstock punched from the Decorative Ribbon Border Punch and a piece of 5/8” Burlap Ribbon. Dimensionals were used to add some depth.
I hope you enjoyed all my cards. Below are the Stampin’ Up! samples I mentioned earlier. Thank you so much for stopping by.


The easy way to shop! Click on images below for more details & to add to your order.


The new annual catalog is here!

The Stampin’ Up! annual catalog has arrived! Not only does it showcase some of our best and newest stamping supplies, but it offers you the opportunity to earn even more free stuff than usual. Of course, you still get more free stuff for every dollar sold at your party, but you’ll also earn an additional $35 when your party takes in more than $350. Think of it – you can get certain stamp sets, ink, or a lot of paper FREE – just for having your friends over for a fun afternoon or evening of stamping!
But, like everything, this won’t last, so jump on it now. This new catalog won’t be new forever. You’ve only got until June 30th to host your party to take advantage of this great offer. So pick a good date and call Vicki today!
Reminder: The New Catalog Party is at my house on June 10th at 11am. RSVP by June 6th to reserve your seat. This class is free.
Day #42
This card was made with the High Tide & Something to Celebrate Stamp Set. Other supplies used: Pool Party Cardstock, Serene Scenery Designer Series Paper (DSP), Night of Navy, Smokey Slate & Crumb Cake Classic Ink & Rhinestone Basic Jewels.
Day #41

This card was made with the Nailed It Stamp Set & Build It Framelits. Other supplies used: Smokey Slate & Whisper White Cardstock, Urban Underground Specialty Designer Series Paper (DSP), Basic Gray Classic Ink, Banner Triple Punch and Stampin’ Dimensionals.
Day #40

This card was made with the Crafting Forever Stamp Set. Other supplies used: Crumb Cake, Basic Black & Whisper White Cardstock, Basic Black Classic Ink, Watercolor Pencils (I used white only but you can use any color you like.)

Follow me…